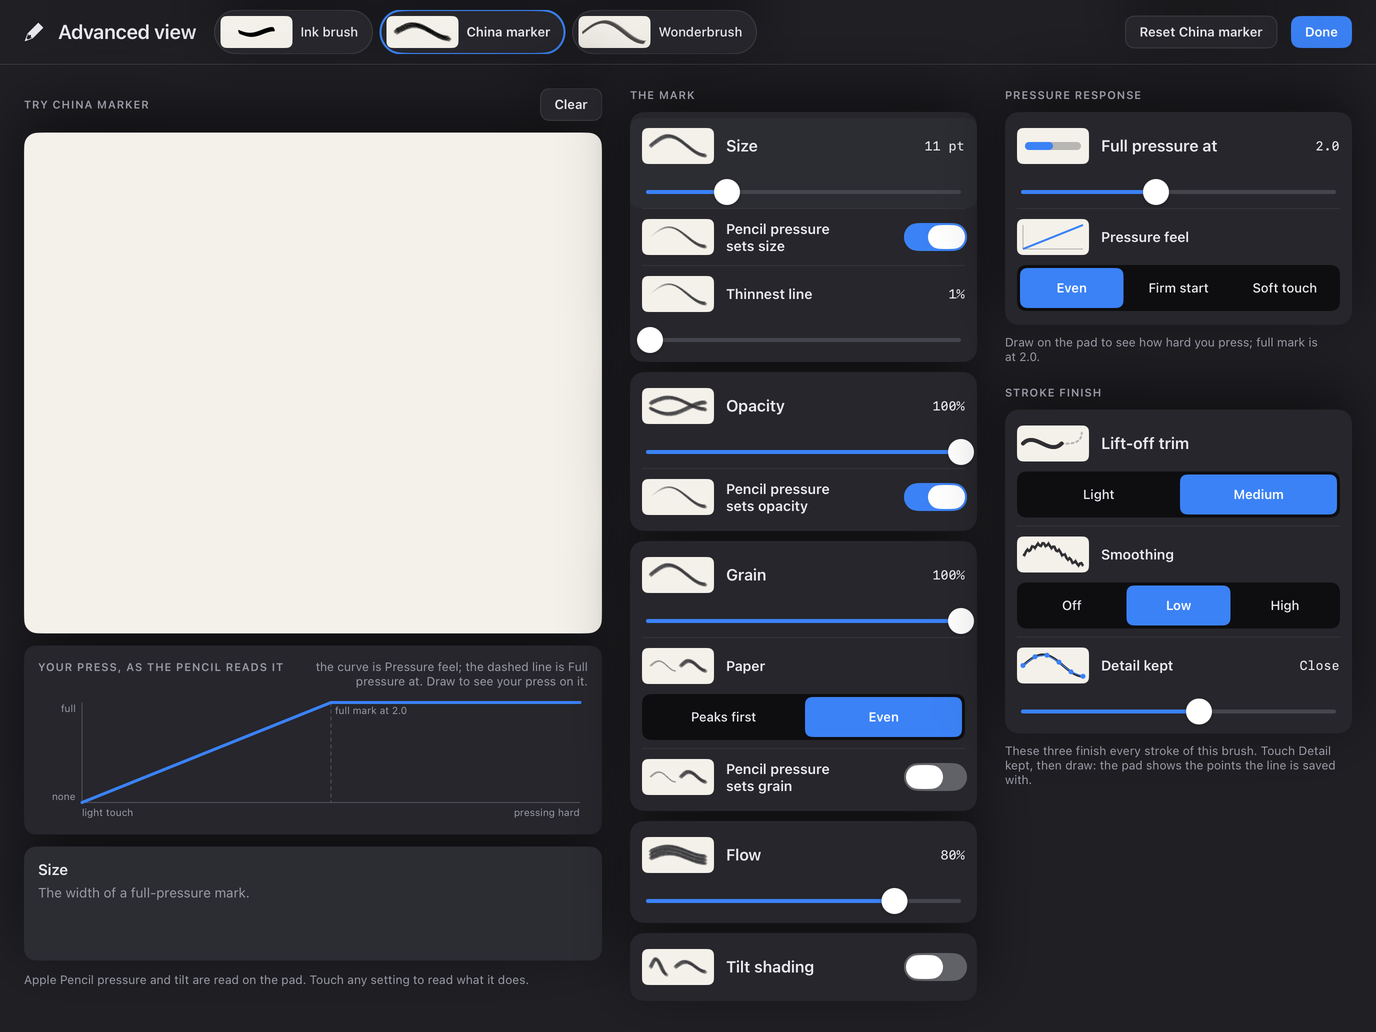
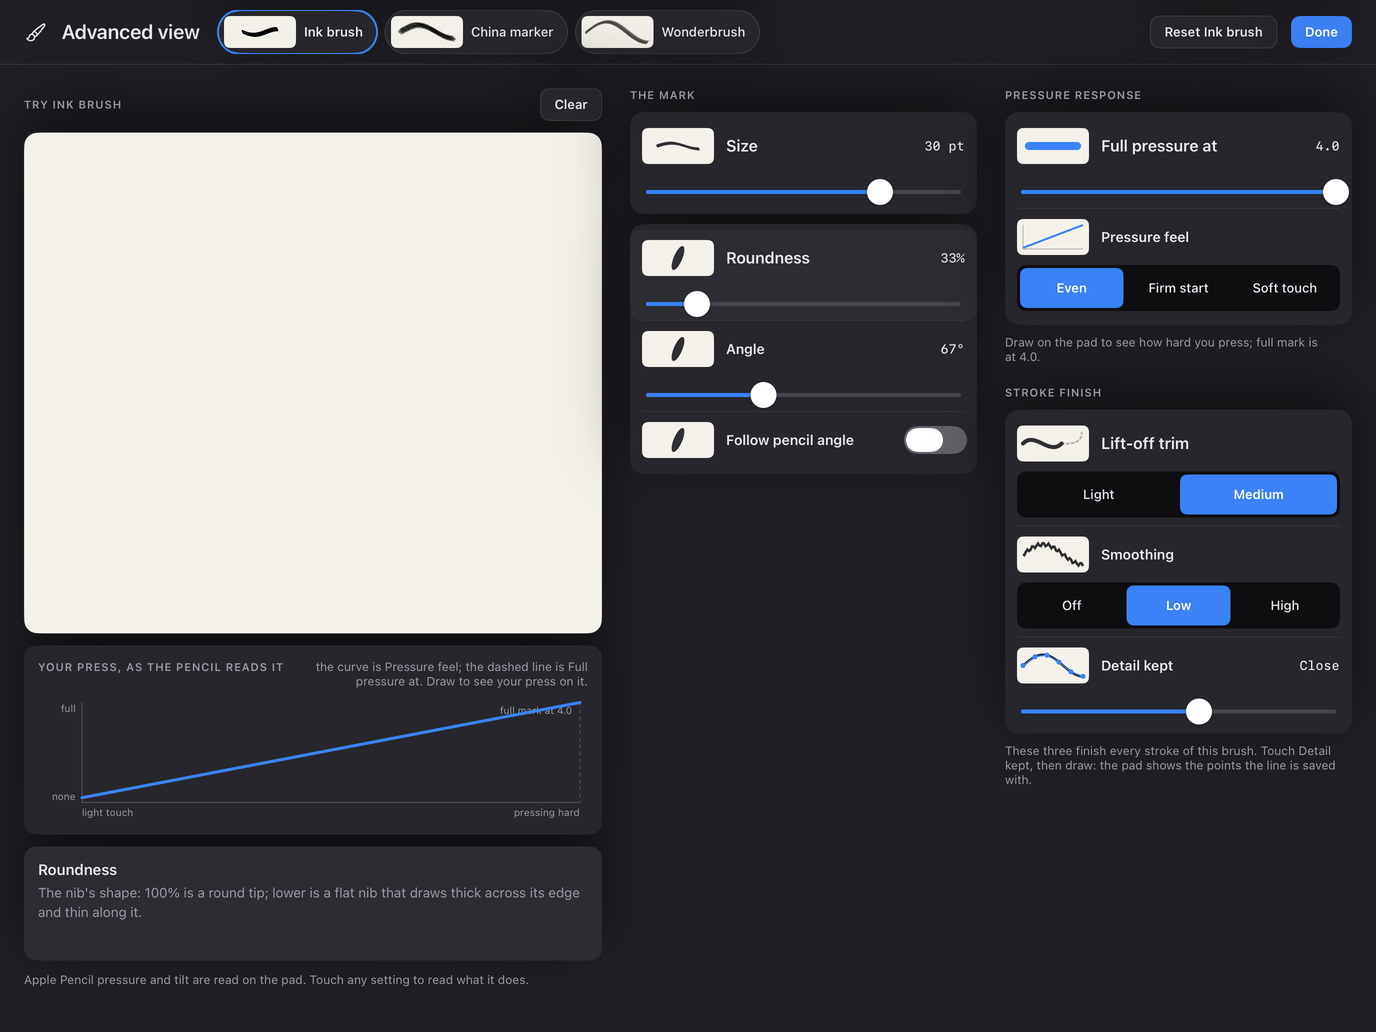
The view opens over the Studio from the Advanced view button — in the quick settings of the active brush or pencil, and under the list in the Brushes tab — and closes with Done (or when playback starts). Changes apply as you make them; Reset restores the shown brush's defaults and leaves the others alone.
- The test pad is the real canvas engine drawing into a scratch area: pressure and tilt are read exactly as on the canvas, with the settings as they are now. Nothing drawn here reaches the storyboard, undo or autosave. It pans and pinch-zooms; Clear empties it and resets the view.
- Your press, as the pencil reads it plots the brush's pressure curve: the dashed line is Full pressure at, the curve is Pressure feel. While you draw a dot rides the curve at your current press and the caption reads the mark it makes; after a stroke a needle keeps the hardest press.
- The explainer repeats, in a sentence or two, what the setting you last touched does.
- The mark holds the cards a brush has: the Ink brush shows Size and Nib; the China marker Size, Opacity, Grain, Flow and Tilt shading; the Wonderbrush the same without Grain. Pressure response and Stroke finish apply to every brush.
Every brush keeps its own settings. Nothing here changes a document: brush settings are device preferences, and the strokes you draw with them are saved as drawn.