Documentation

Upshot documentation

Every control of the app, explained on the real interface. Hover or tap an outlined control to read what it is and what it does.

The Studio

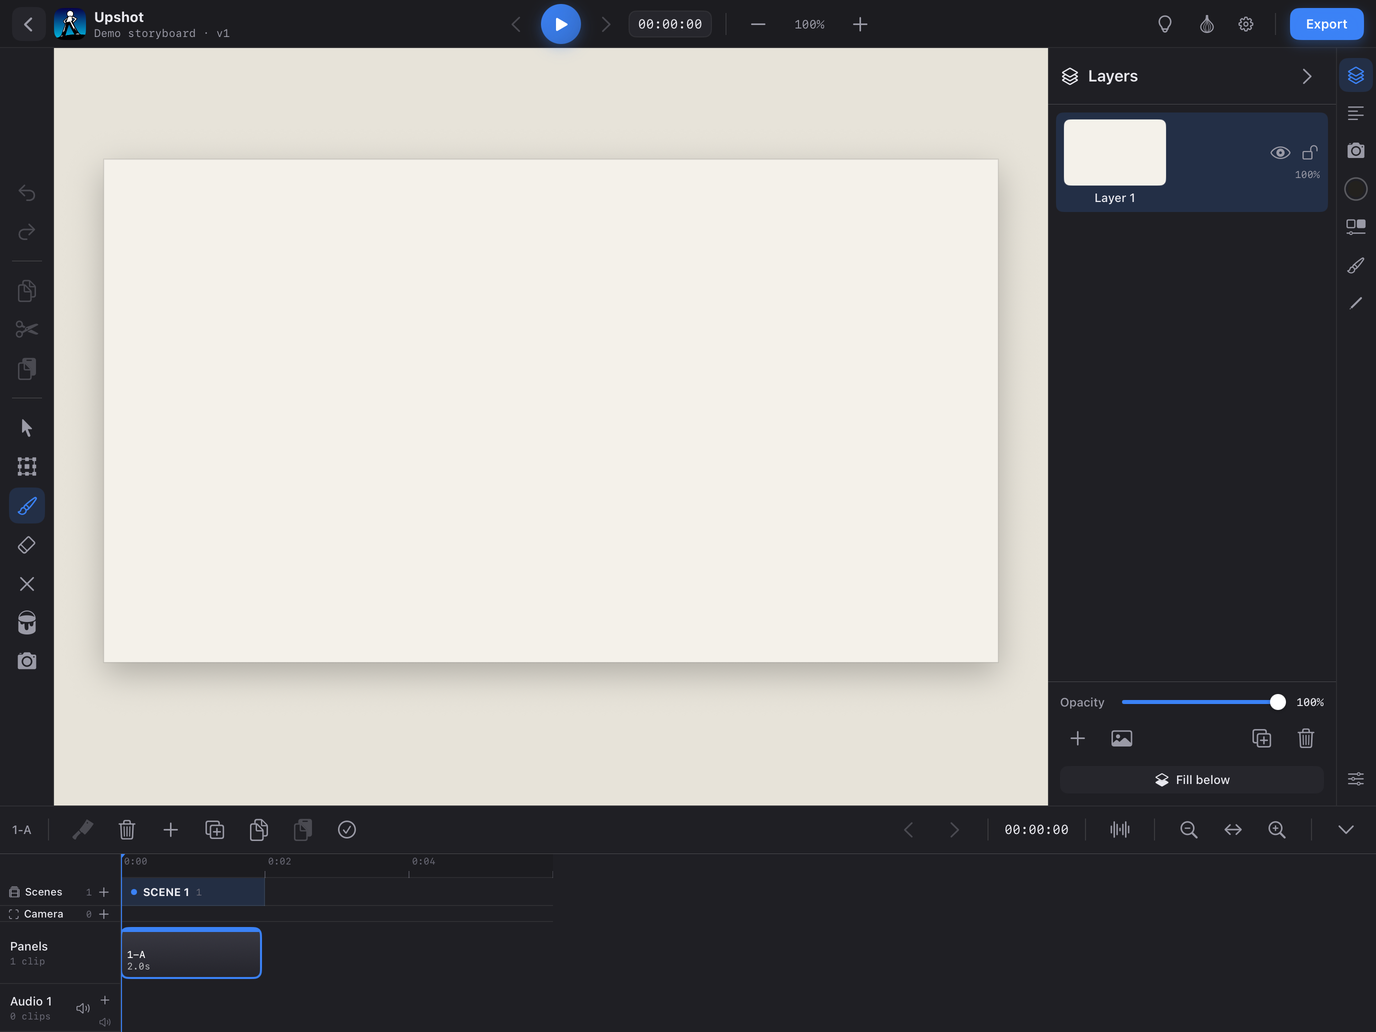
The editor: the canvas in the middle, the tool rail on the left, the timeline at the bottom and the sidebar panels on the right (Layers shown). Every panel and bar can be collapsed: with the sidebar and timeline folded the whole screen is canvas, and everything stays reachable through the Pencil quick menu or, with a keyboard attached, the shortcuts.

The Studio

Hover or tap an outlined control to read what it does.

Apple Pencil and the quick menu

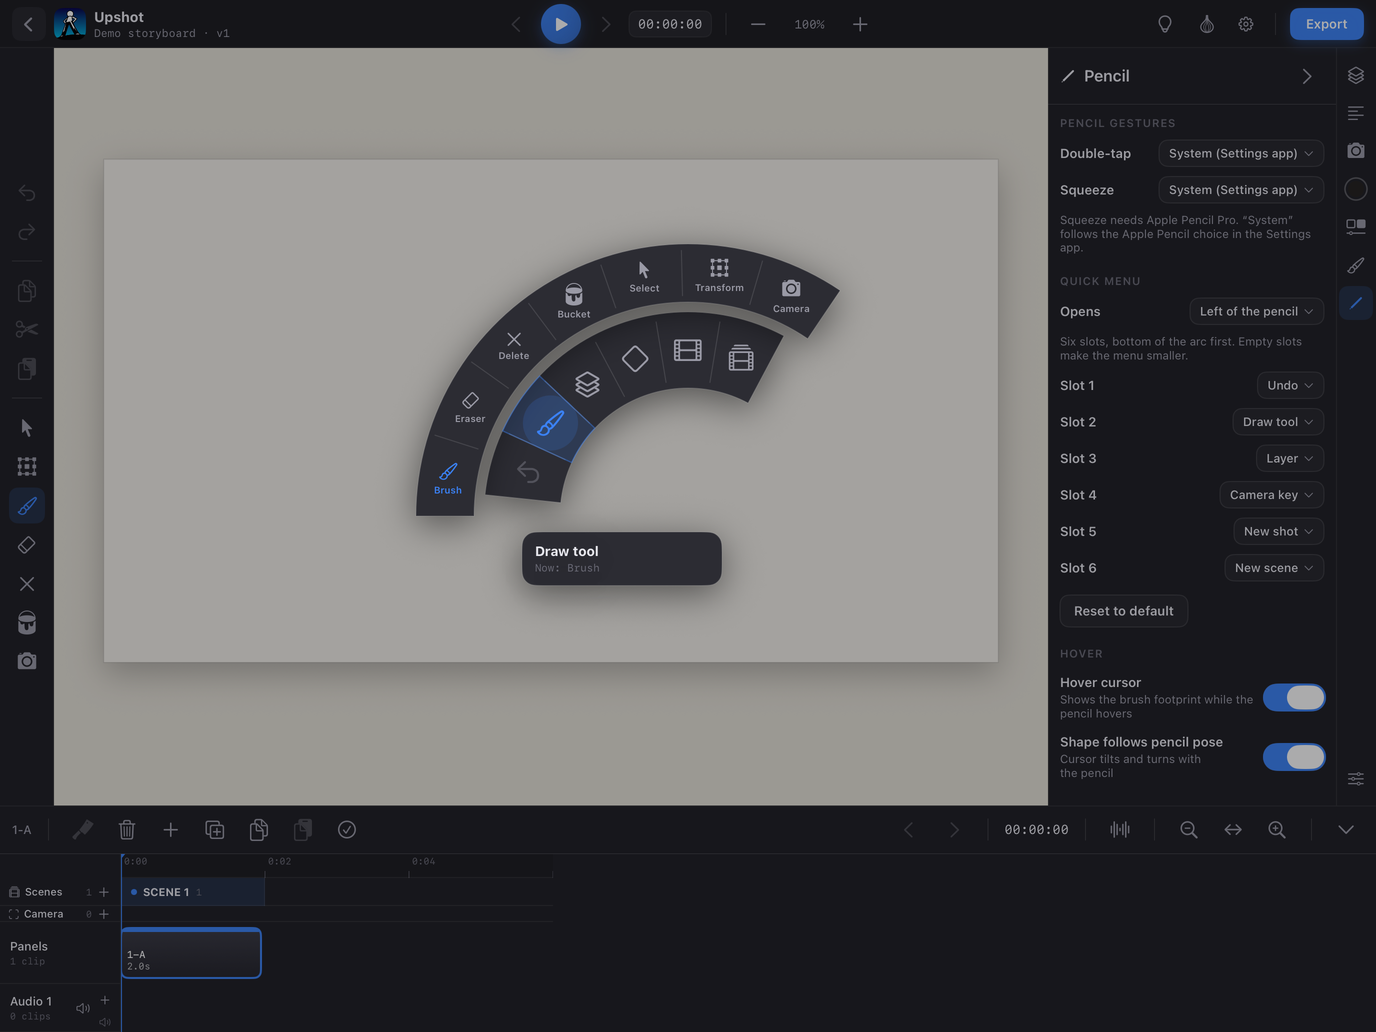
The Pencil panel and the quick menu. Squeeze the Pencil (Pencil Pro; assignable to double-tap as well) and the quick menu opens under the tip: six slots, each with a default action and a ring of alternatives. Most of what the bars and panels do is on it — undo, tools, layers, camera keys, new panels and scenes, playback — so you can fold every UI element away and work on the full canvas.

Apple Pencil and the quick menu

Hover or tap an outlined control to read what it does.

The Library

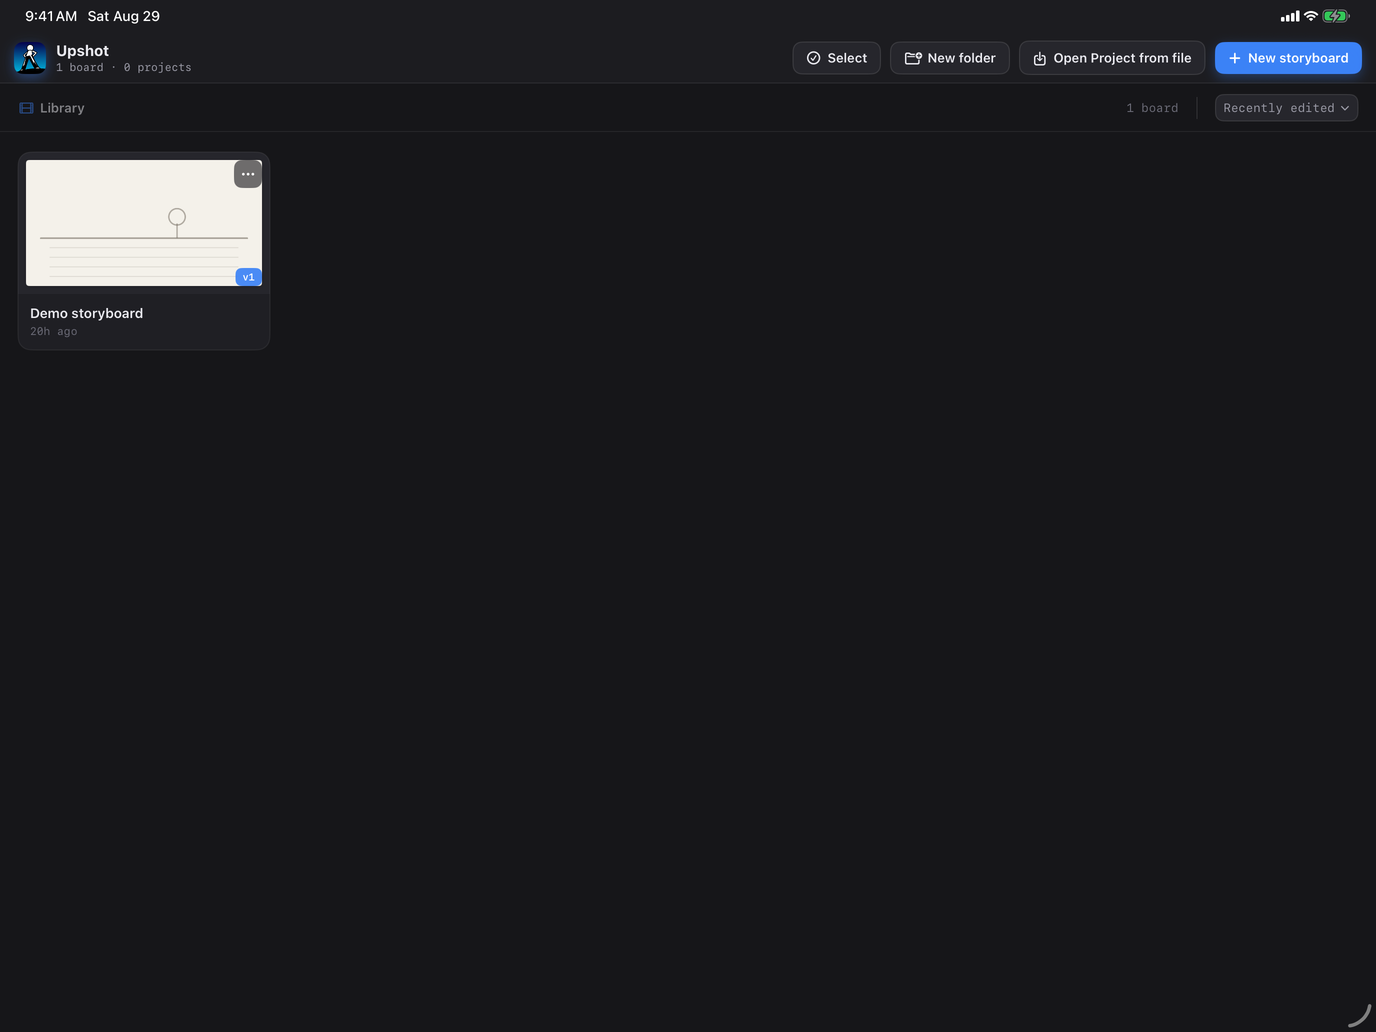
Where storyboards and folders live. Every storyboard keeps its own versions, so you can branch and go back.

The Library

Hover or tap an outlined control to read what it does.

Keyboard shortcuts

With a hardware keyboard attached. Tool keys are bare letters and are ignored while you type in a text field.

Everywhere

⌘ZUndo
⇧⌘ZRedo
⌘X / ⌘C / ⌘VCut / Copy / Paste
⌘ASelect all

Library

⌘NNew storyboard…
⌥⌘NNew folder
⌘OOpen project from file…
⇧⌘SSelect items / Done selecting
⇧⌘MMove…
⌥⌘MMove into storyboard…
⌘⌫Delete selected…
⌘↑Enclosing folder

Studio — file

⇧⌘WClose storyboard
⌥⌘IImport audio…
⇧⌘IImport image…
⌘EExport storyboard package…
⇧⌘,Project settings…
⌘,Preferences…

Studio — edit

Delete selected strokes
⇧⌘ADeselect
⌥⌘HMirror horizontally
⌥⌘JMirror vertically
⌥⌘CCopy panels
⌥⇧⌘CCopy scene
⌥⌘VPaste panels

Studio — view

⌘=Zoom in
⌘−Zoom out
⌘0Actual size
⇧⌘OOnion skin
⌥⌘LLight table
⌥⌘TTimeline
⌃⌘=Timeline zoom in
⌃⌘−Timeline zoom out
⌃⌘0Timeline fit
⌃⌘1 … ⌃⌘8Sidebar: Layers, Script, Camera, Color, Selection, Brush, Pencil, Settings

Studio — storyboard

⇧⌘NNew panel
⌘DDuplicate panel
⌘⌫Delete panel
⌥⌘SNew scene
⌘RRename scene…
⇧⌘LNew layer
⇧⌘DDuplicate layer
⇧⌘⌫Delete layer
⇧⌘MFill below

Studio — tools

VSelect
TTransform
BBrush
EEraser
XDelete stroke
GBucket
CCamera
]Increase brush size
[Decrease brush size

Studio — playback

SpacePlay / Pause
⌘→Next panel
⌘←Previous panel
⌘↑Go to start
⌘KAdd camera keyframe
⌥⌘→Next keyframe
⌥⌘←Previous keyframe
⌥⌘PCamera preview

Apple Pencil

Pressure drives the brush width; tilt and azimuth shape the nib when Follow pencil angle is on in the Brush panel. Hovering a Pencil Pro (or a 2nd-generation Pencil on M2 iPads) shows a cursor with the exact footprint the ink will get.

Squeeze opens the quick menu by default; double-tap switches to the eraser. Both are assignable in the Pencil panel (quick menu, undo, eraser, previous tool, color panel, brush panel, and more).

The quick menu is customizable: six slots you fill from Undo, Draw tool, Layer, Camera key, New panel, New scene, Redo, Onion skin, Light table, Play / Pause, Next / Previous panel and Fit to frame, and a side (left or right) it opens on. Each slot has a ring of options — Draw tool lists every tool, Layer offers New / Duplicate / Visible, Camera key offers Hold / Push 140% / Preview / Stop, New scene offers New / Rename…

Together with the keyboard shortcuts (when a keyboard is connected) this is how you work with everything collapsed: fold the sidebar and the timeline, and the entire screen is canvas.

Split View and smaller windows

Below about 1000 points of width (Split View, Stage Manager, iPad mini) the Studio folds: the tool rail's clipboard becomes one menu, the timeline's left-hand actions gather under a ⋯ menu, the top bar wraps onto two or three rows and the export button becomes a share icon. The Library folds its top-bar actions into a ⋯ menu below about 820 points. Nothing disappears — it moves into a menu.

Concepts and formats

  • Frame and resolution. The frame is what exports; it follows the project resolution set in Project Settings. Changing the resolution re-frames around the center and never rescales your drawing. The canvas itself is unbounded.
  • Scenes, panels, layers. A storyboard is scenes of panels; every panel has its own layers. Camera moves belong to the scene and are keyframed on the timeline.
  • Versions. Each storyboard keeps versions (Versions… in the card menu). Make one current, duplicate it, or extract it as a standalone board.
  • Audio. Several tracks; clips on different tracks play together. Muted tracks are left out of exports.
  • Image layers. Photos or files become a layer of their own, transformable like strokes.
  • Storyboard Package (.sboardx). An open, documented zip (SVG art + JSON). It round-trips through Upshot bit-perfectly, opens in the web reader, and the Toon Boom bridge scripts read and write it.
  • Exports. Movie (.mov) at the project resolution with audio; Avid AAF for Media Composer (always 16:9 1920×1080 — other aspect ratios show adjacent canvas content in the pillar/letterbox area); Contact Sheet PDF; per-panel images.

Getting started

  1. In the Library, tap New storyboard, name it and pick a resolution.
  2. Draw the first panel with the Brush; add layers from the Layers panel.
  3. Add panels with + in the timeline, or duplicate the current one; drag a clip's right edge to set its duration.
  4. Add a scene when the location changes; give scenes camera moves with the Camera tool.
  5. Import audio, press Play, and export a Movie or a Storyboard Package to share.